✍️ How to Draw Hands – A Beginner-Friendly Tutorial
A simple step-by-step hand drawing tutorial for beginners. Learn to draw hands using basic shapes, master proportions, and practice natural poses to improve your anatomy skills.
ANATOMYFUNDAMENTALS
Clicreates
9/5/20252 min read

Hands are one of the trickiest parts of the human body to draw. They’re complex, full of joints, and flexible in countless ways. But once you break them down into basic shapes, drawing them becomes much easier.
This tutorial will guide you through the process of studying and constructing hands step by step.
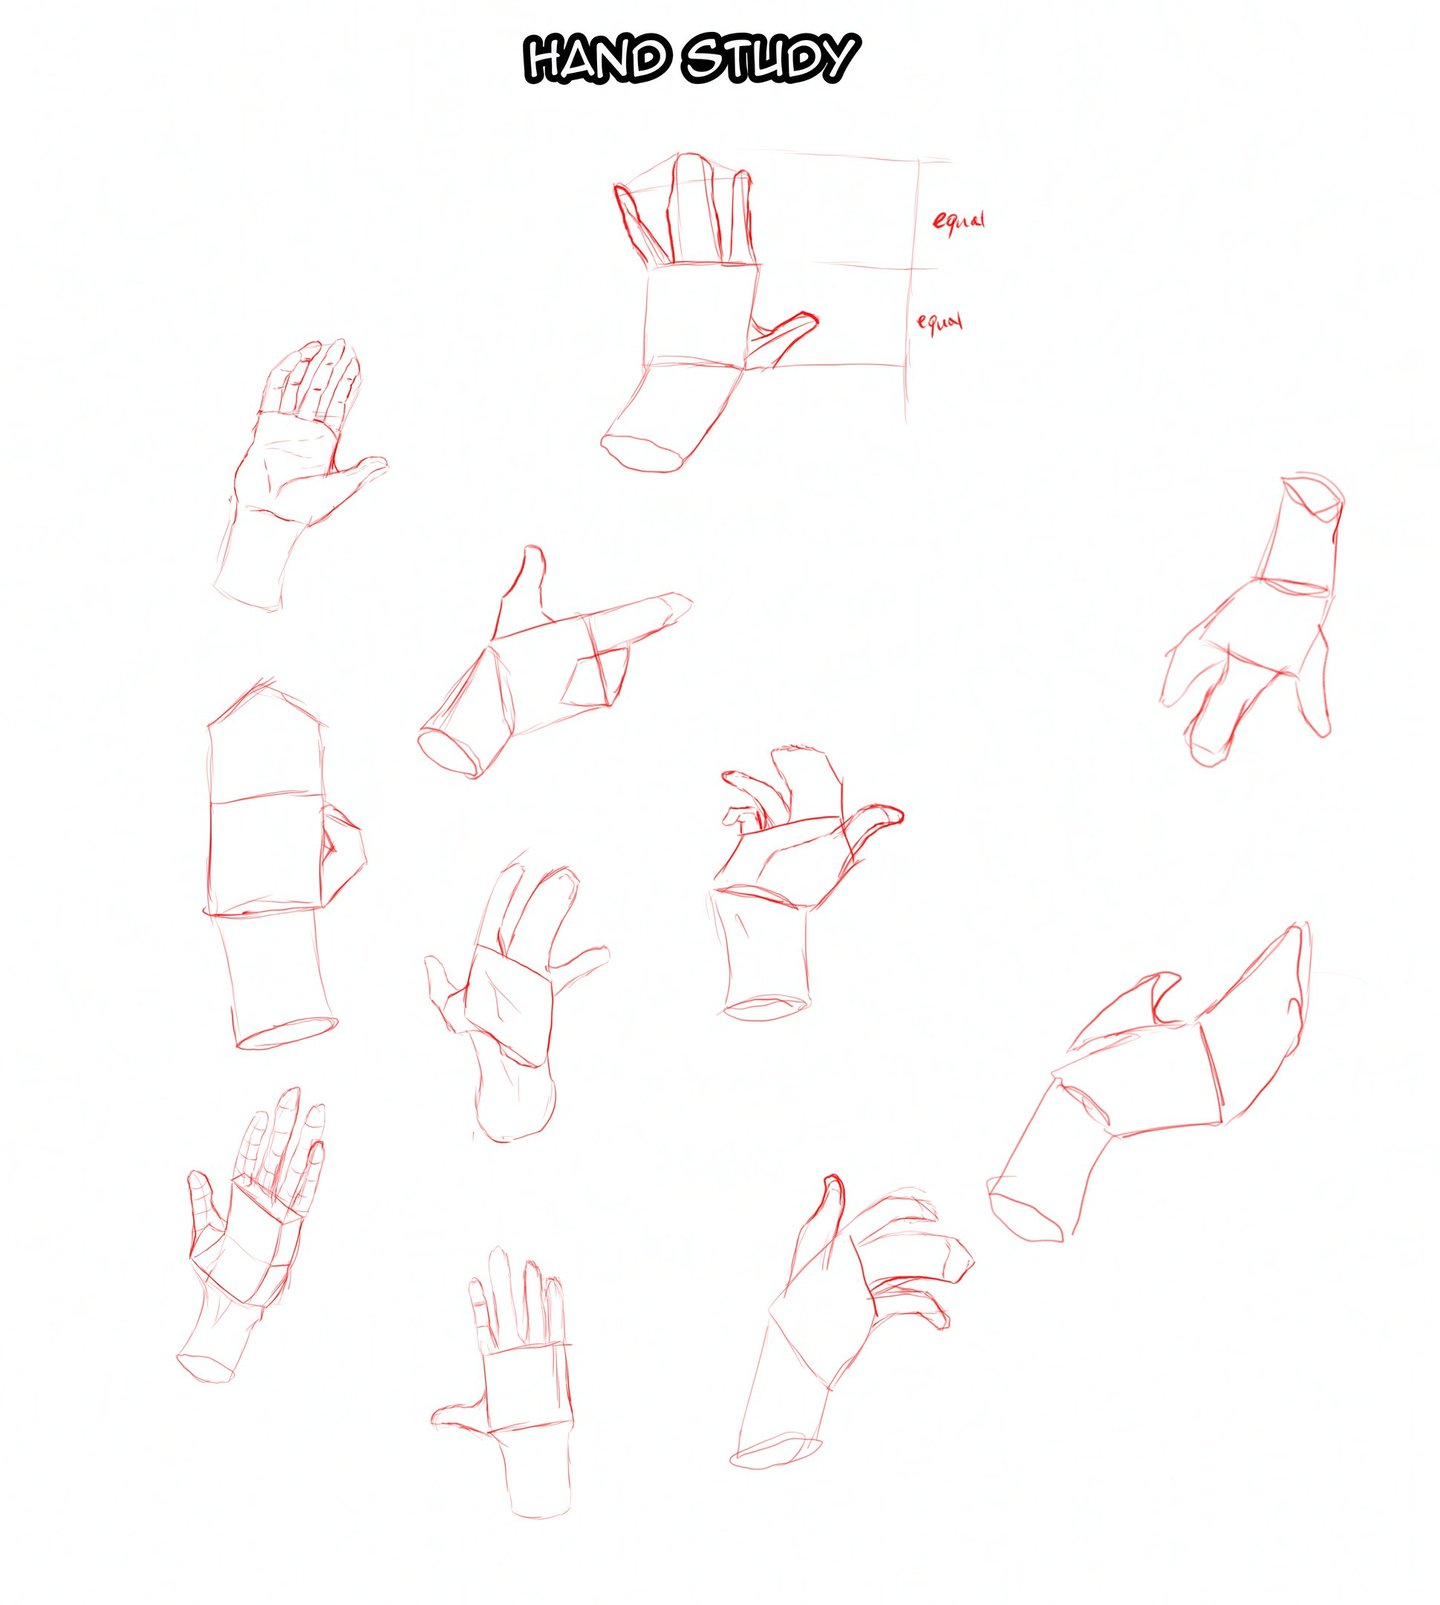
1. Start with Simple Shapes
Before jumping into details, reduce the hand into basic geometric forms:
Palm → a box or rectangular block.
Fingers → cylinders or elongated boxes.
Thumb → another box, attached at an angle to the palm.
Wrist → a cylinder that connects to the arm.
By starting this way, you can quickly establish the perspective and gesture of the hand.
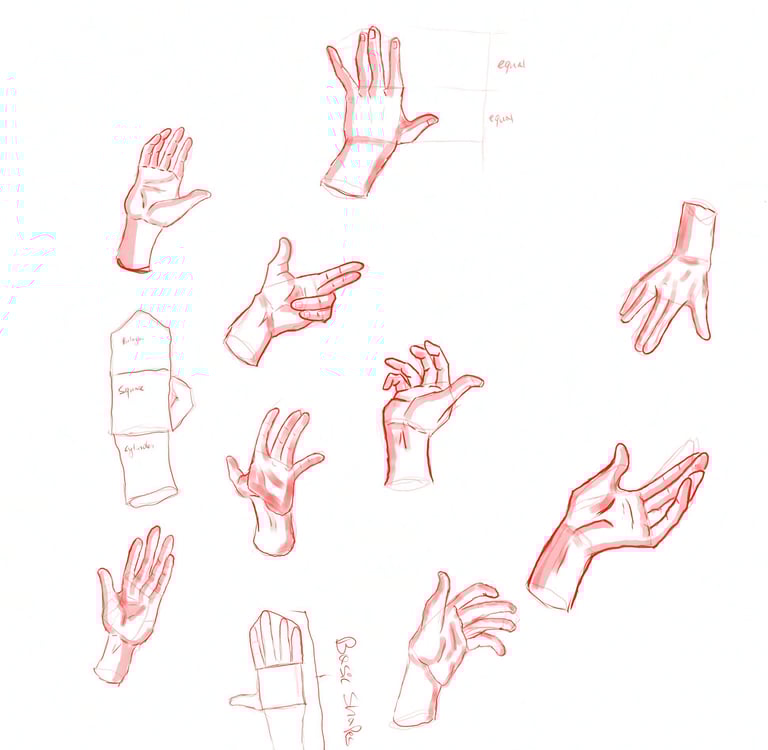
2. Divide the Palm into Sections
The palm can be divided into three main parts:
Base of the fingers (top of the palm).
Center of the palm (flat plane).
Wrist connection (bottom).
In the reference study, you’ll notice how the palm was sketched as stacked shapes: polygon → square → cylinder. This helps maintain proportion and perspective.
3. Add Finger Placement
Draw the knuckles as a curve (they aren’t in a straight line).
Sketch fingers as elongated boxes or cylinders, keeping in mind:
The middle finger is usually the longest.
Fingers taper slightly toward the tips.
The pinky is the shortest.
Tip: Think of the fingers as a fan shape rather than perfectly parallel.
4. Sketch the Thumb Separately
The thumb is tricky because it’s set at a different angle than the fingers.
Draw it starting from the side of the palm.
Construct it as a smaller box/cylinder.
Notice its range of motion → it can bend across the palm.
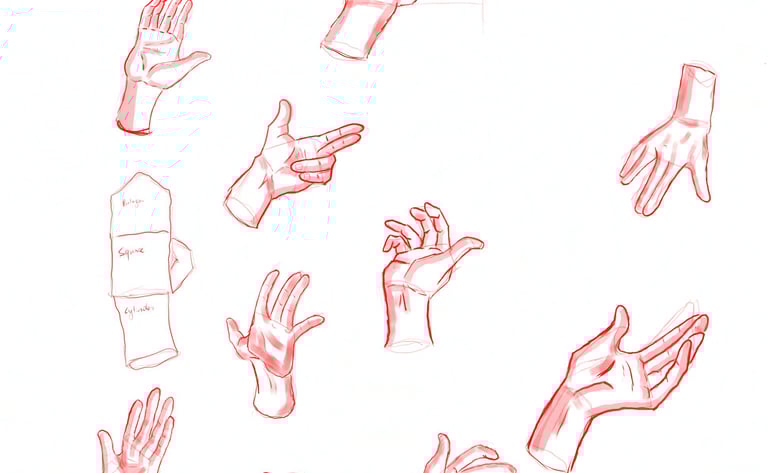
5. Block Out Gesture & Movement
Once the palm and fingers are placed, adjust them to capture the gesture of the hand.
Open hand → fingers spread apart like a fan.
Relaxed hand → fingers curve naturally inward.
Dynamic poses (pointing, grabbing) → exaggerate the gesture for more life.
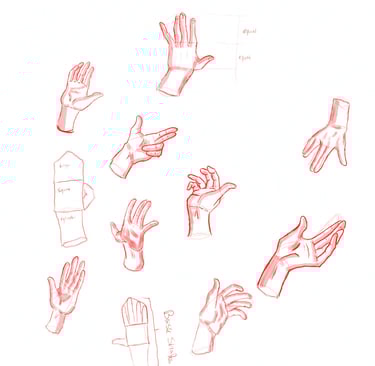
6. Add Structure & Details
When you’re happy with the block shapes, start refining:
Indicate knuckles, joints, and finger bends.
Add the creases in the palm.
Show the tendons on the back of the hand for realism.
At this stage, your drawing goes from blocky shapes to a recognizable hand. Watch the timelapse at the end for more reference.
7. Practice Different Angles
The study images show hands from multiple perspectives:
Palm up
Palm down
Side view
Fingers curled
Dynamic action poses
Practicing with varied angles builds confidence and makes your hands look natural in storytelling and character design.
🔑 Key Takeaways
Always start simple: block out shapes before adding detail.
Think of the palm as a box, the fingers as cylinders, and the thumb as a separate piece.
Use curves for the knuckles and remember the “fan shape” of the fingers.
Practice from multiple angles—repetition builds skill.
✍️ With consistent practice using this block-shape method, your hand drawings will look more natural and dynamic, and you’ll feel more confident adding them into your art and webtoon panels.